How To Install VX.2.14 Products. Detailed Guide Based On PADS Professional
This guide provides a comprehensive step-by-step tutorial for the seamless installation and configuration of the PADS Professional or PADS Professional Premium software package, along with its licensing. Whether you’re new to PADS or upgrading to the Premium version, this manual will guide you through the process.
Please Note: This guide is applicable to PADS Professional version VX.2.14 and similar versions. We will specifically focus on setting up a digital floating license key with SALTD daemon, which allows configuration on a network server for access from multiple networked computers.
Additionally, this guide can be a valuable resource for those who are installing other software packages from the Siemens EDA portfolio: HyperLynx, Xpedition, etc.
Now, let’s dive into the detailed steps to ensure a successful installation and setup of PADS Professional Premium.
- Collect from a supplier required files:
- PADS Professional offline installer for Windows, in our case called “PADSProVX.2.14_win64.zip”
- Siemens License Server, in our case called “SiemensLicenseServer_v2.3.0.2_Win64_x86-64.exe”
- License files in txt or lic format.
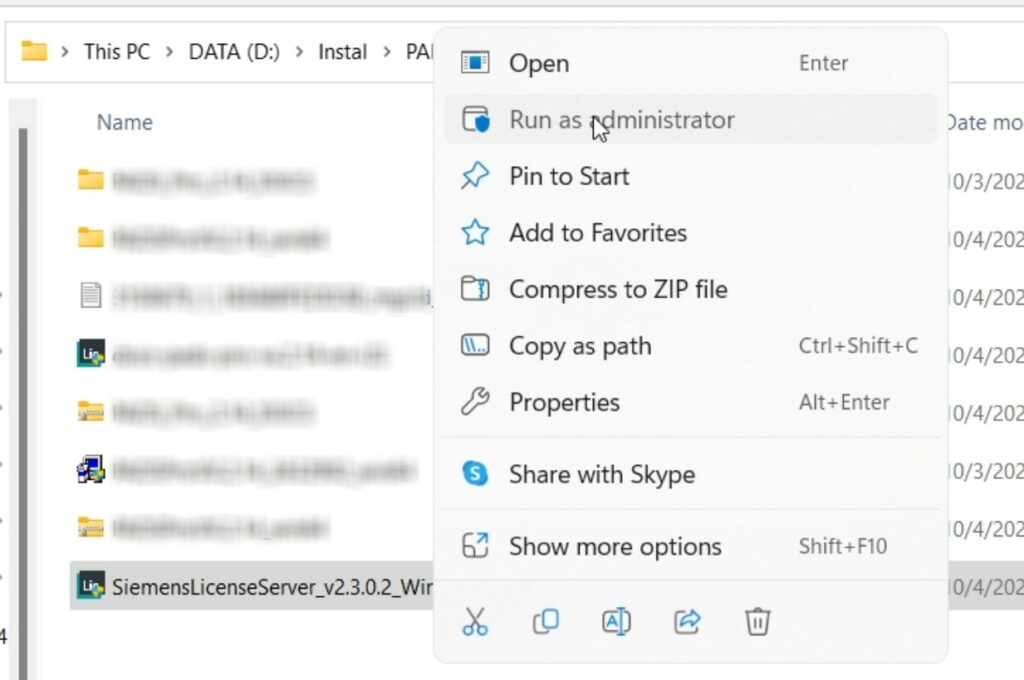
2. Run Siemens License Server as administrator.
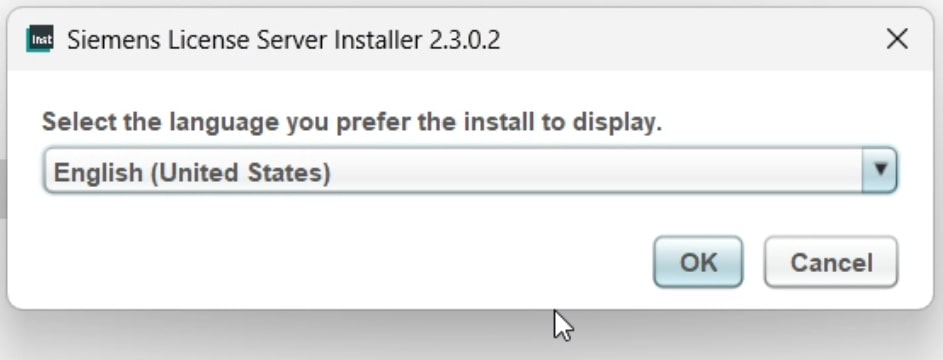
3. Select preferred installation language.
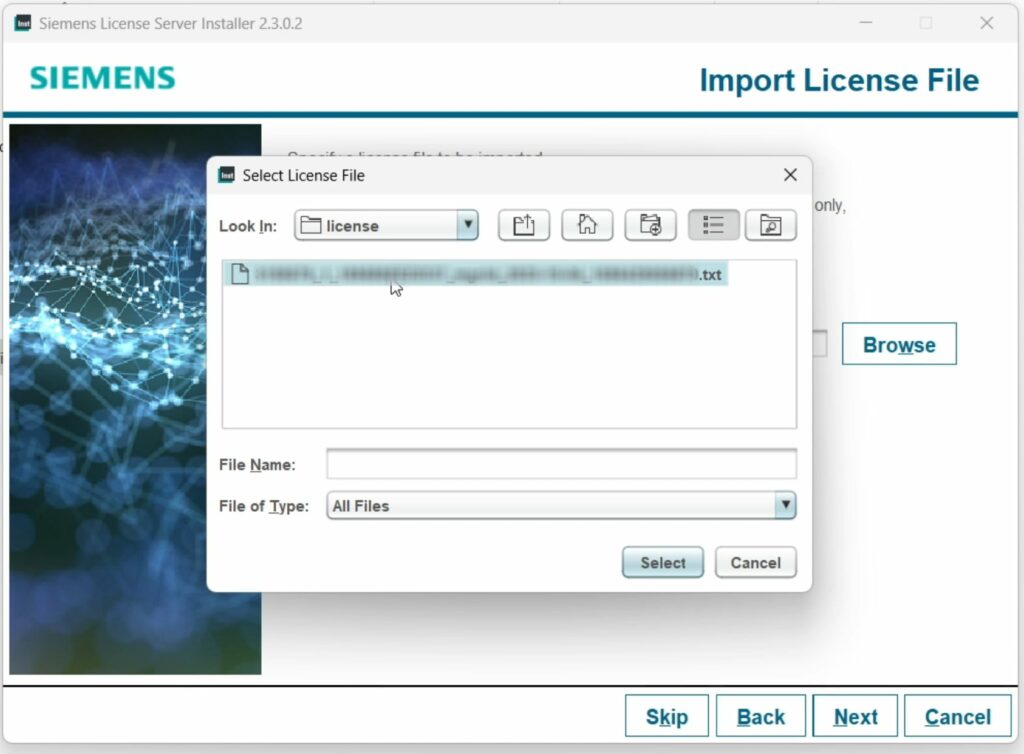
4. Import your license key.
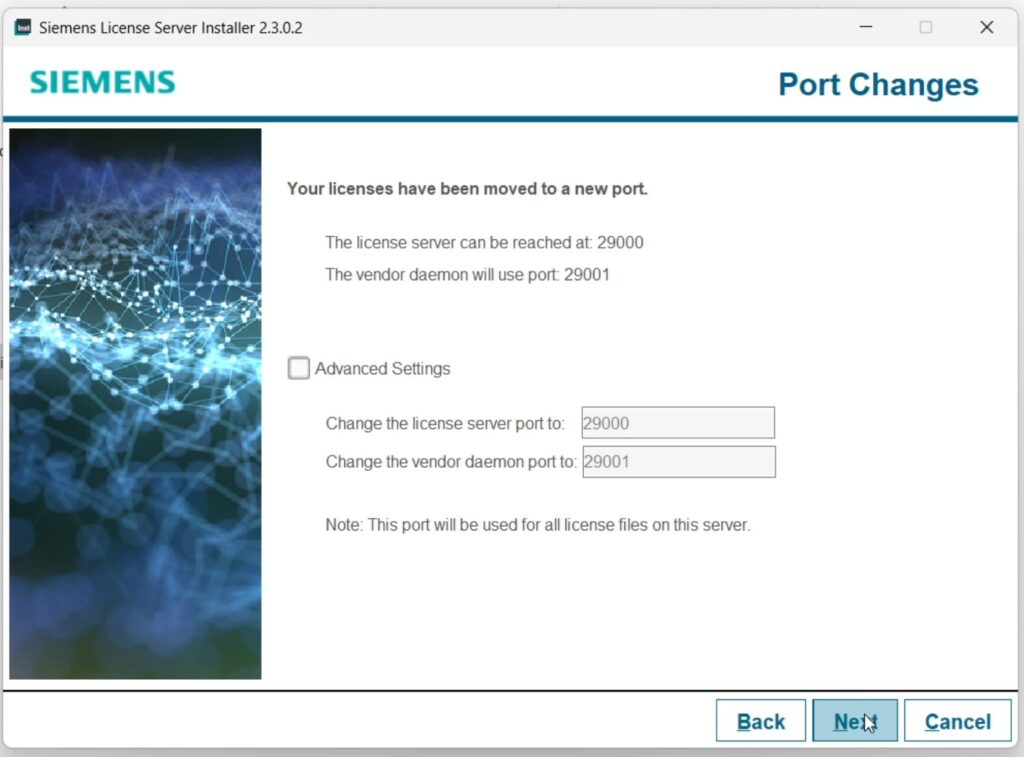
5. Configure network ports (in our case default ports 29000 and 29001 will be used).
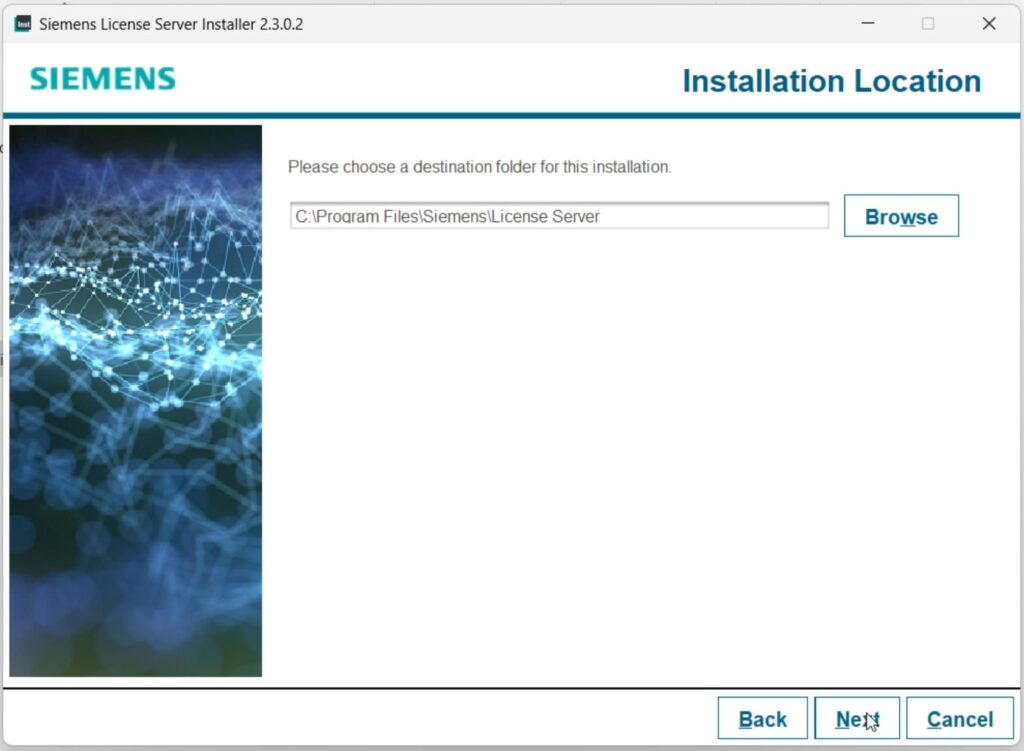
6. Define the destination folder for the licensing server application (we use default location C:\Program Files\Siemens\License Server).
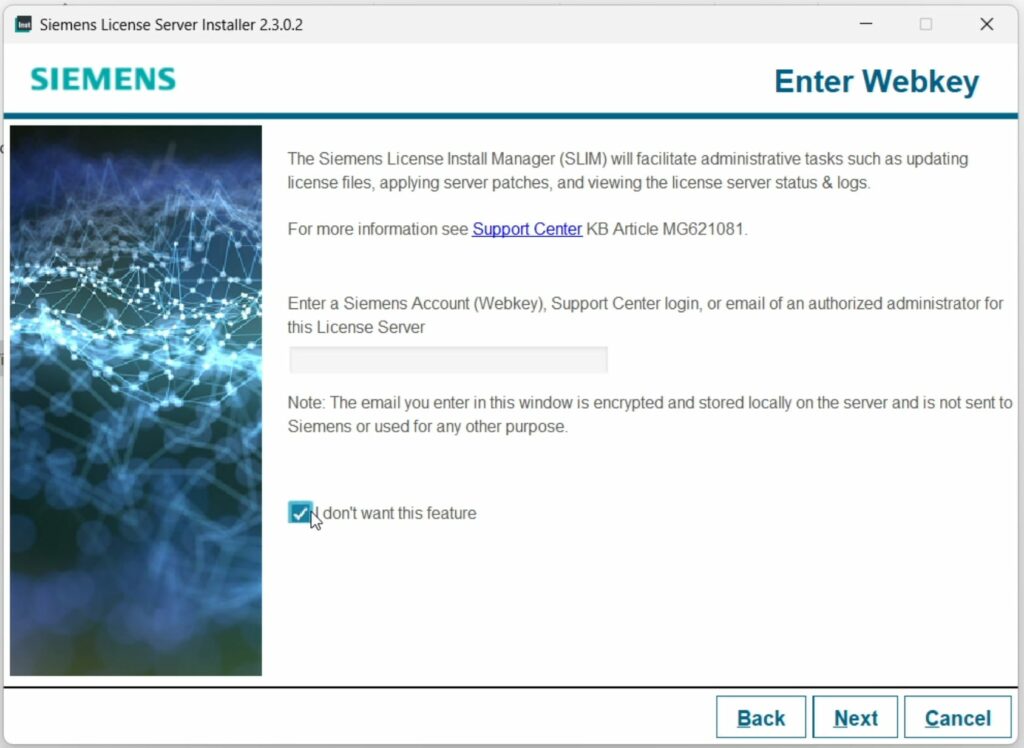
7. Enter a Webkey if you would like to have Siemens License Install Management (SLIM) activated, otherwise click “I don’t want this feature”.
8. Confirm installation by clicking “Next”.

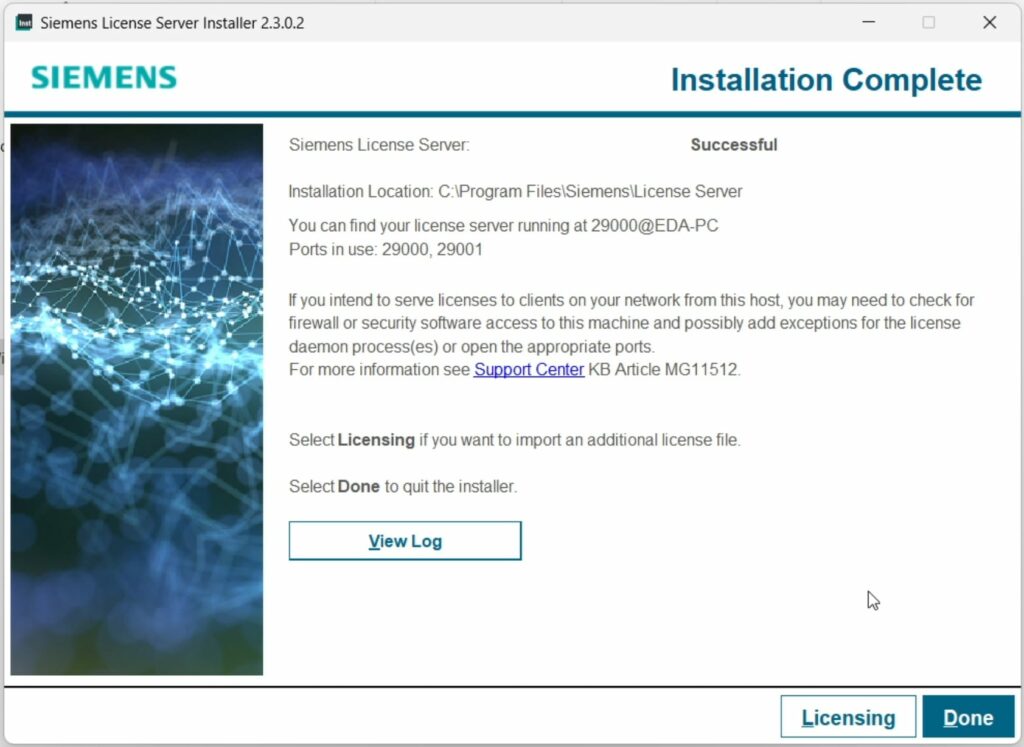
9. Wait till the installation process ends, click “Done”.
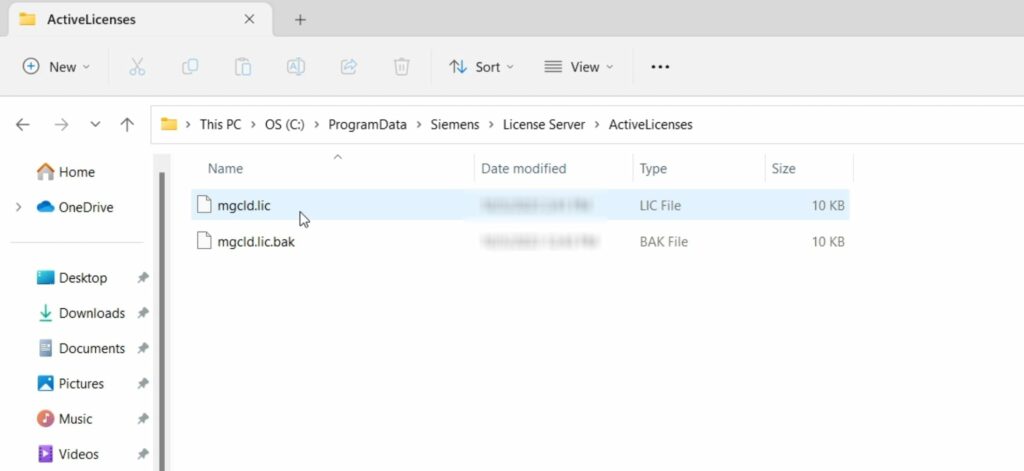
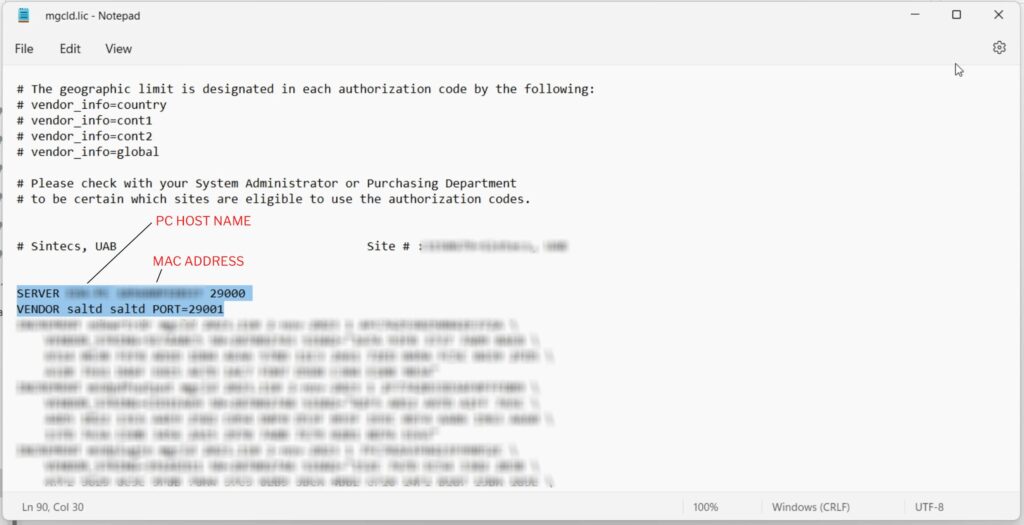
10. (OPTIONAL) Find the license file in the folder with active licenses. Default location: C:\ProgramData\Siemens\LicenseServer\ActiveLicenses.
11. (OPTIONAL) Make sure that the license file is configured correctly. Check the correctness of the PC host name, also make sure if the MAC address in the license file is accurate as well.
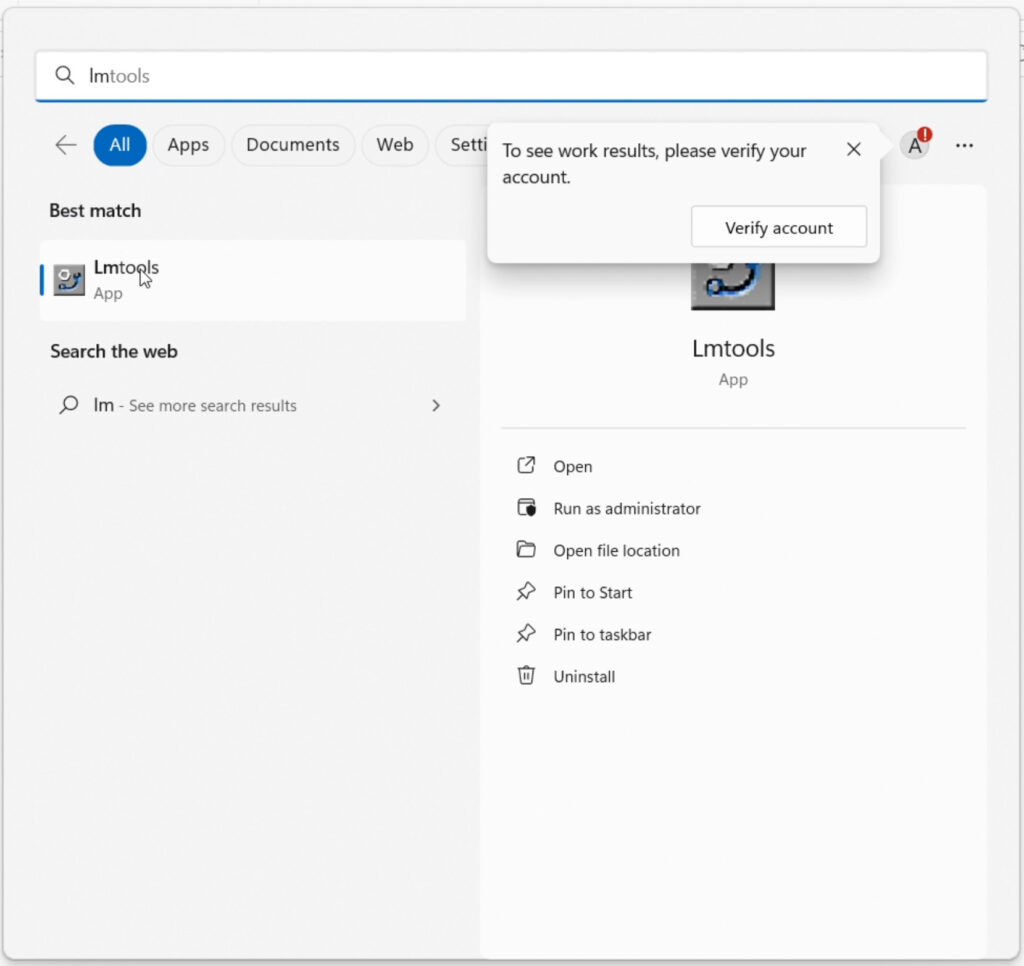
12. (OPTIONAL) Start LMTOOL application (this is a part of the license server software package). LMTOOLS can be quickly found using the main Windows search panel.
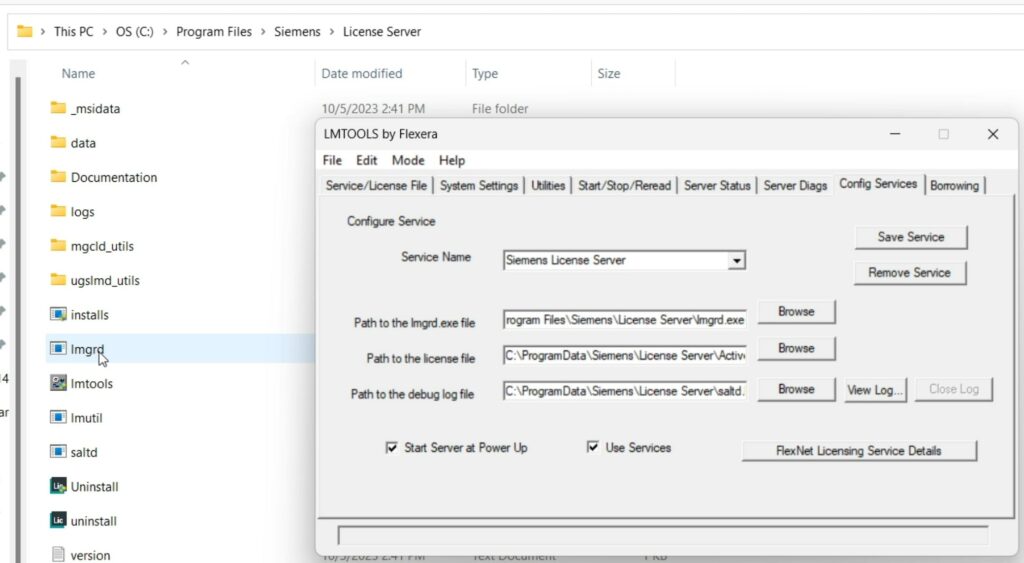
13. (OPTIONAL) Make sure that lmgrd.exe and license files paths are correct.
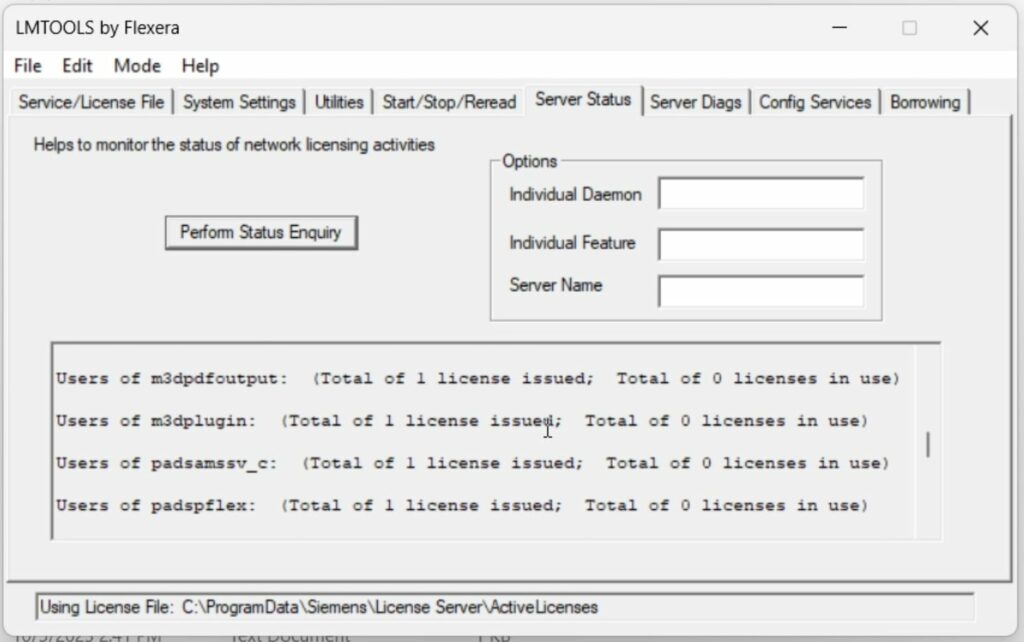
14. (OPTIONAL) In the tab “Server Status” of LMTOOLS click “Perform Status Enquiry” to check the status of the licenses. In case of the correct status of license modules, you will see the messages “Total of x licenses issues” related to each name of the license module.
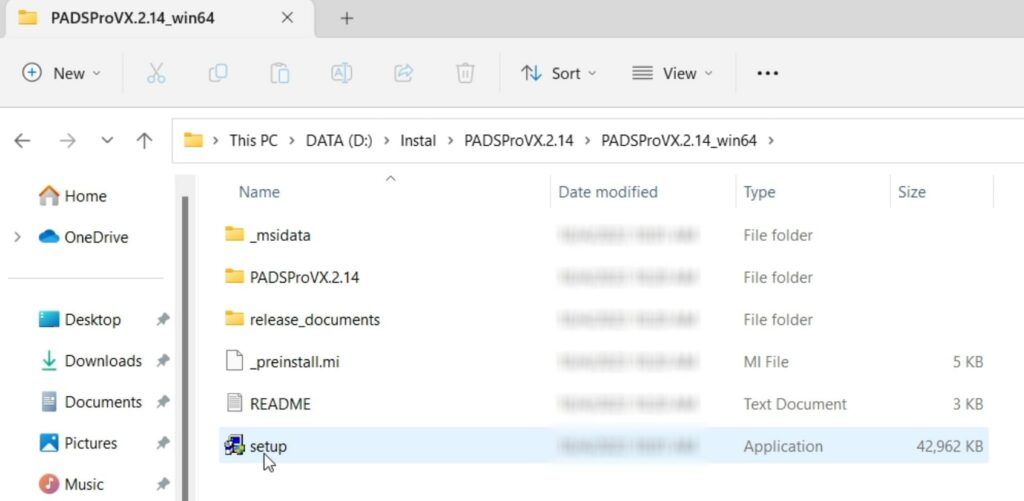
15. Run the installation file of Pads Professional (in our case it is the file “setup.exe” from the preliminary extracted archive “PADSProVX.2.14_win64.zip”) as administrator.
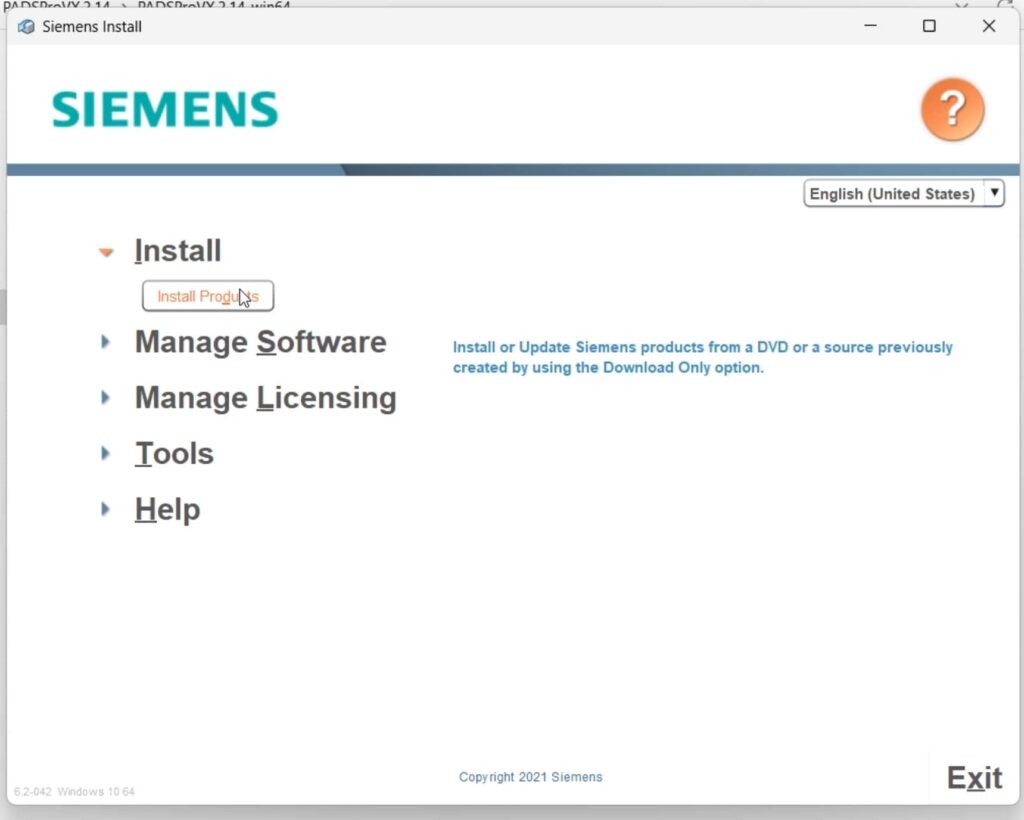
16. Click “Install Products”.
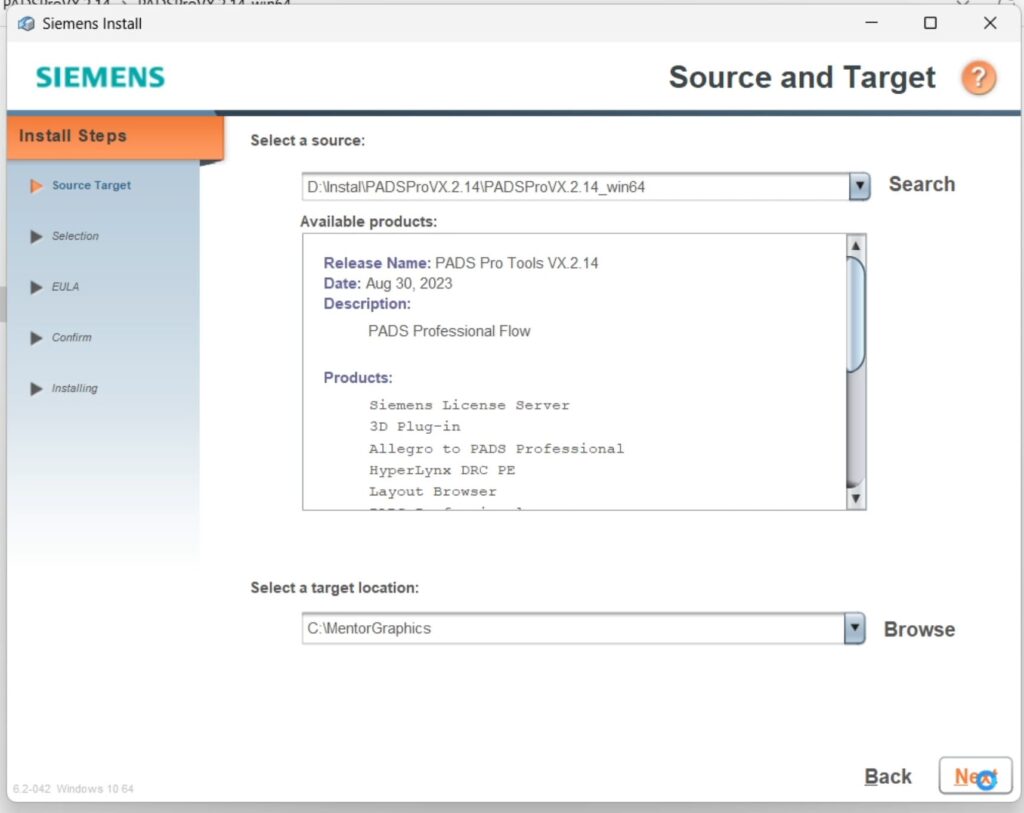
17. Choose the installation folder for the PADS Professional application (we follow default location in the present guide, C:\MentorGraphics).
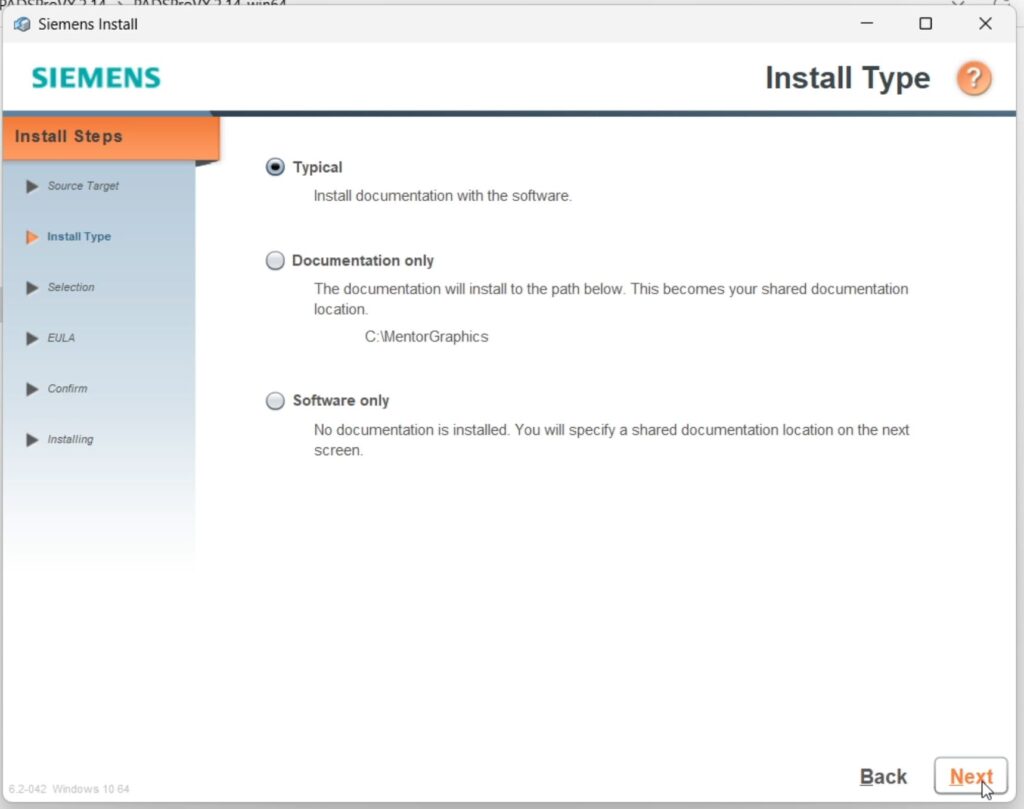
18. Choose a suitable type of installation.
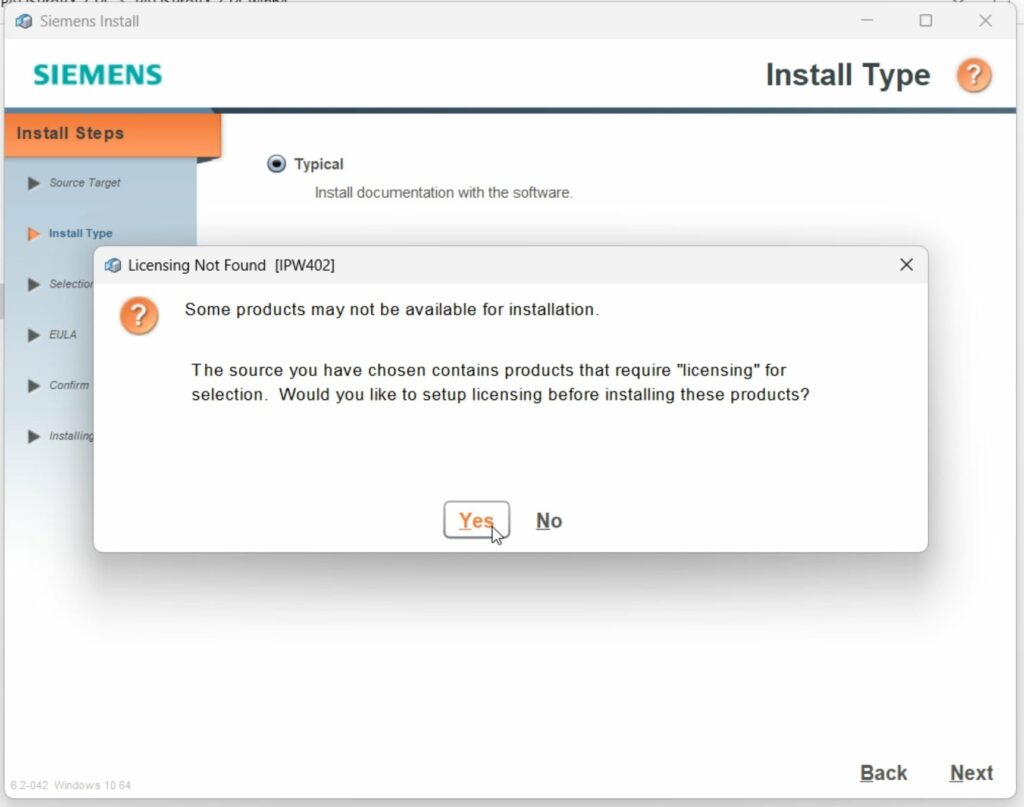
19. Choose to set up licensing before installing PADS Professional.
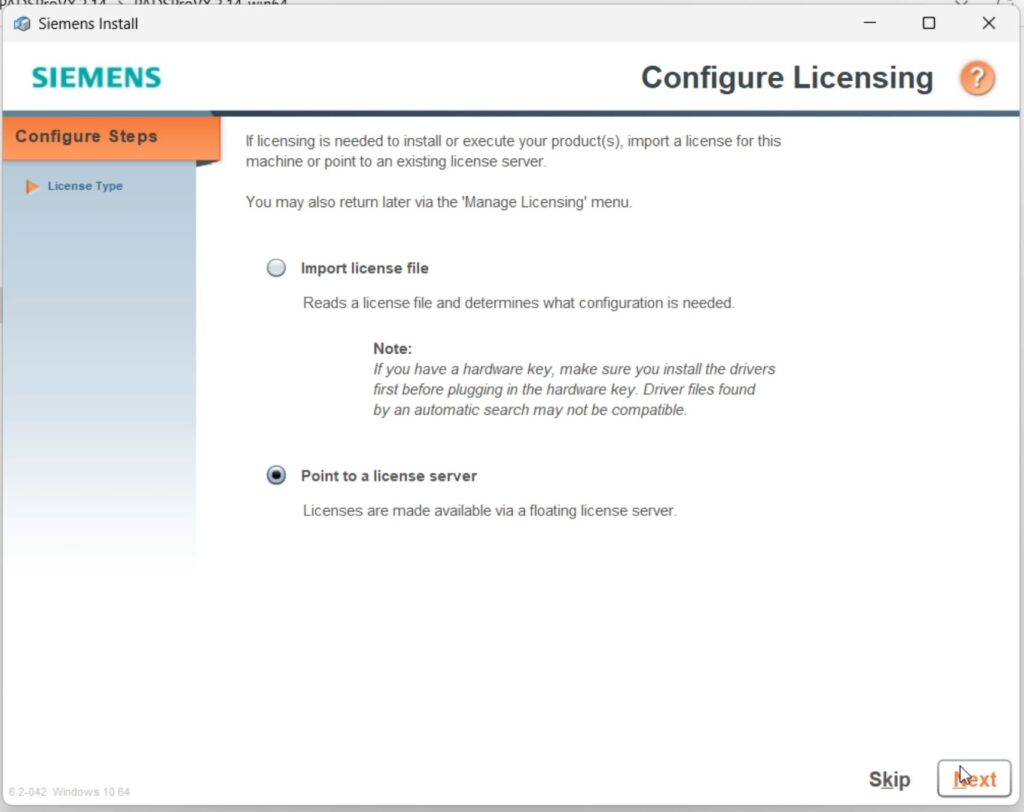
20. If you follow the current guide from the very beginning, choose the “Point to a license server” option.
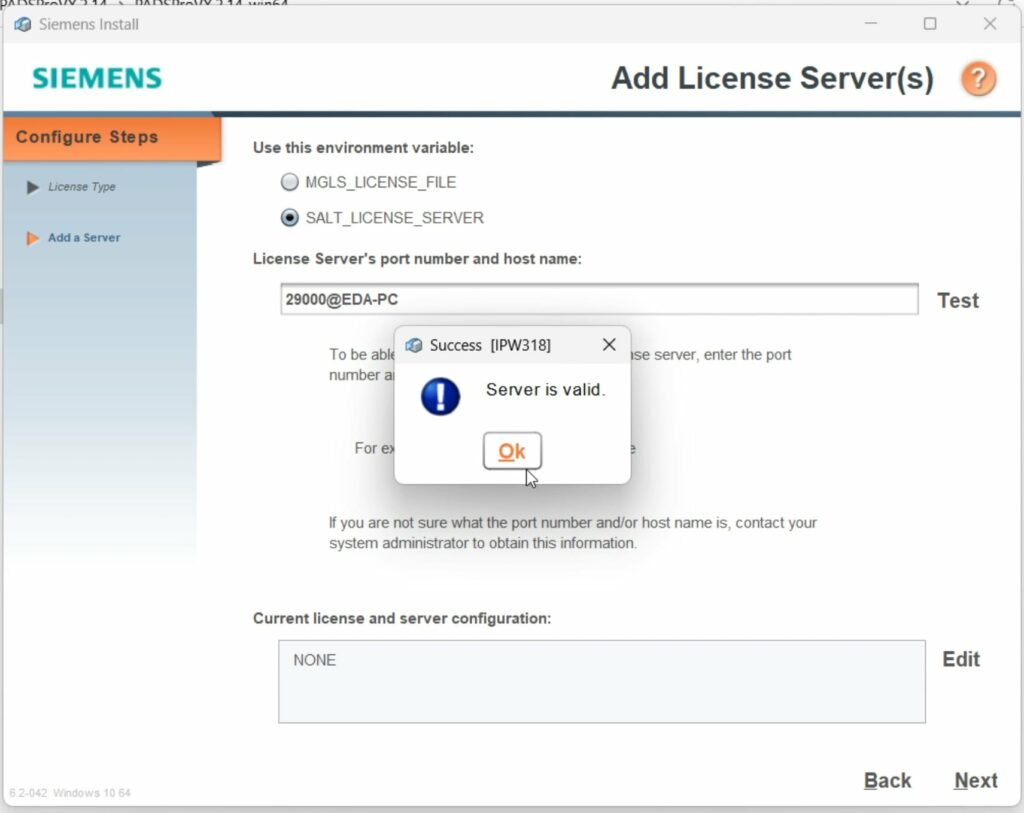
21. Choose “SALT_LICENSE_SERVER” and fill in the correct server’s data (can be copied from the license file). Make sure everything is correct by clicking “Test”.
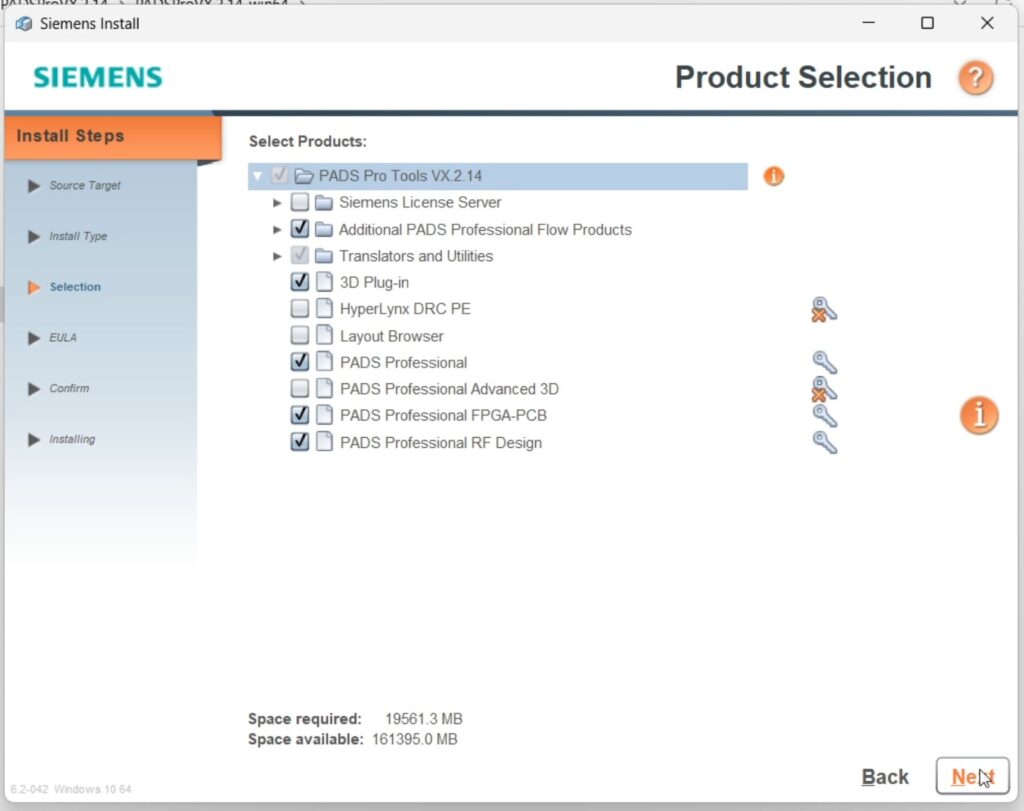
22. Make a choice of products based on available license keys.
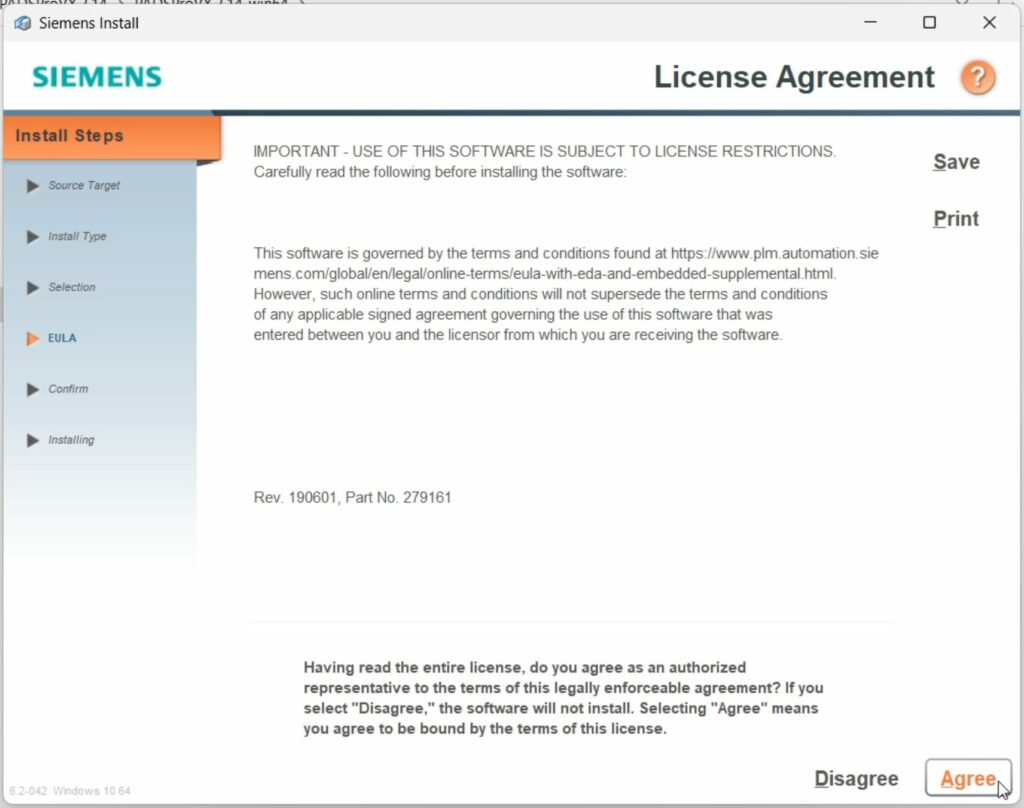
23. Read and accept License Agreement.
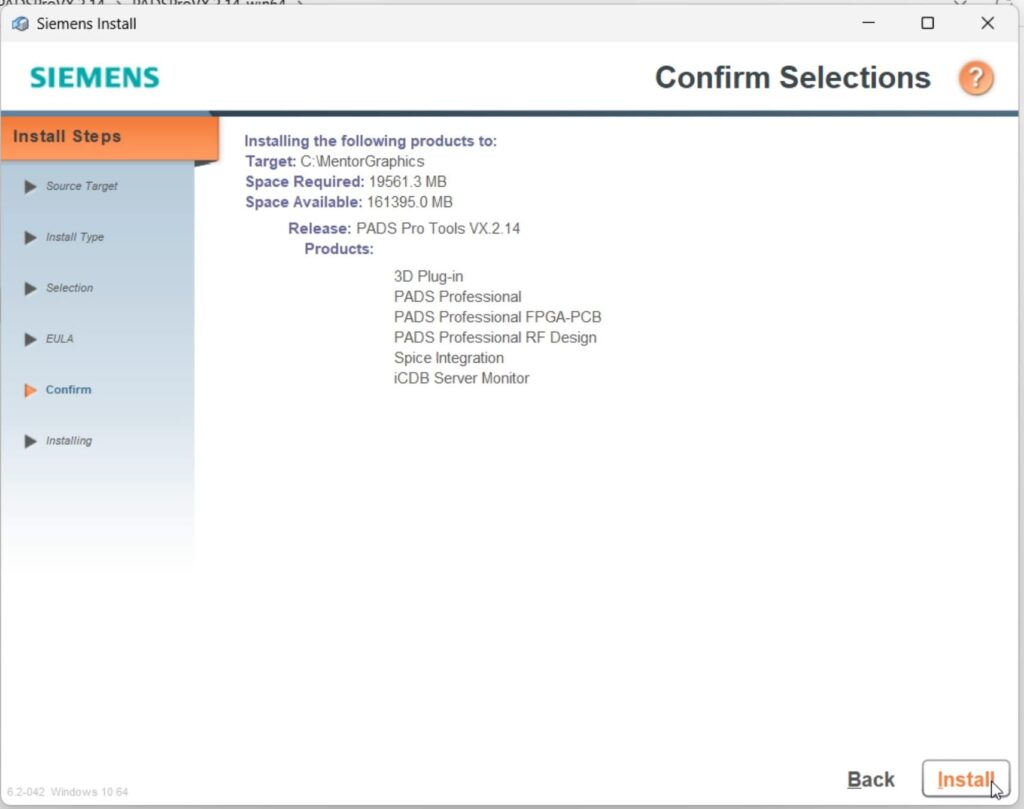
24. Confirm start of installation.
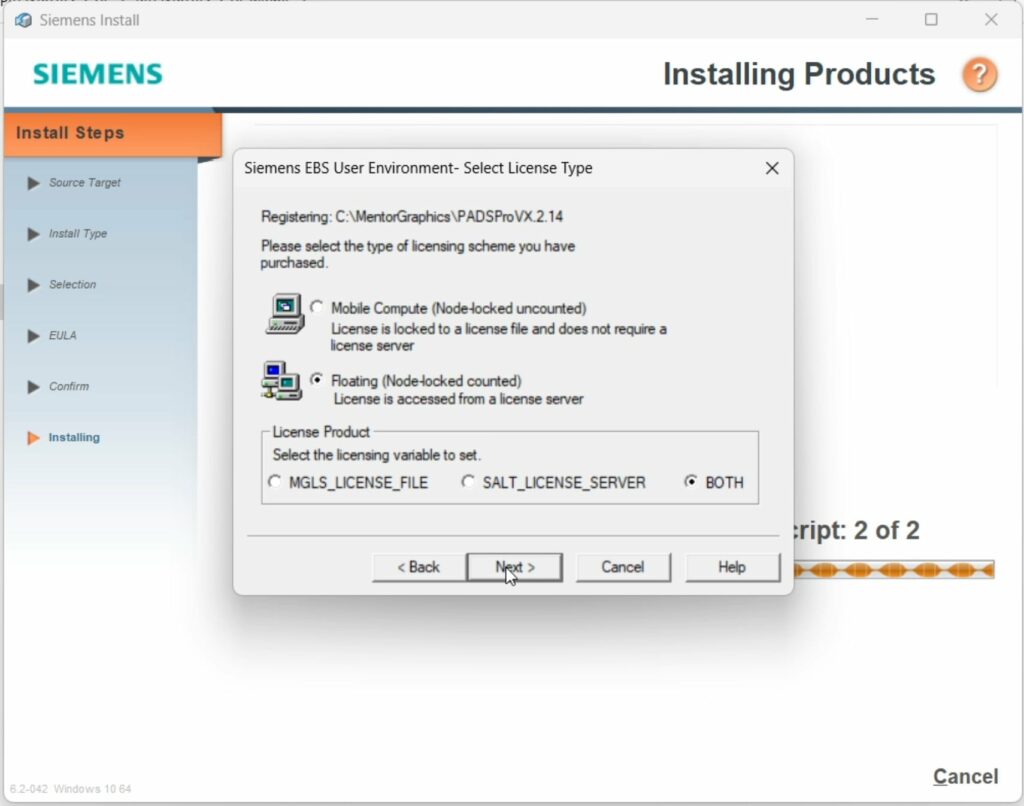
25. During installation a few questions may be asked. For instance, a user needs to confirm if he bought a Floating or a Mobile Compute license.
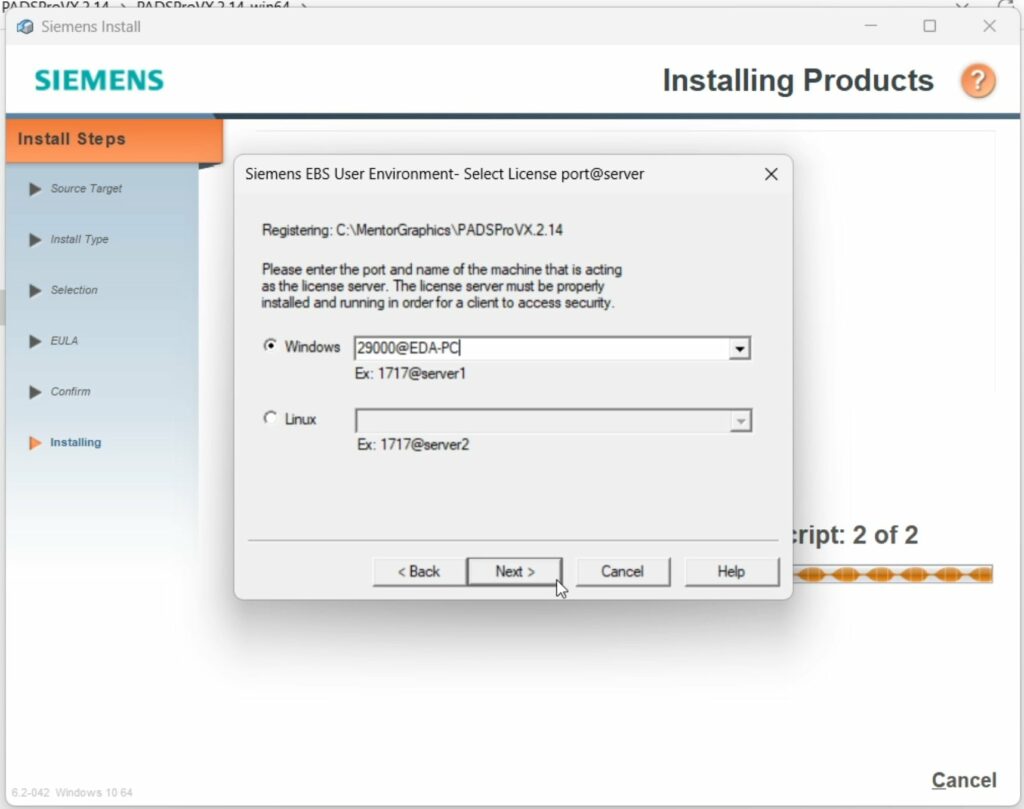
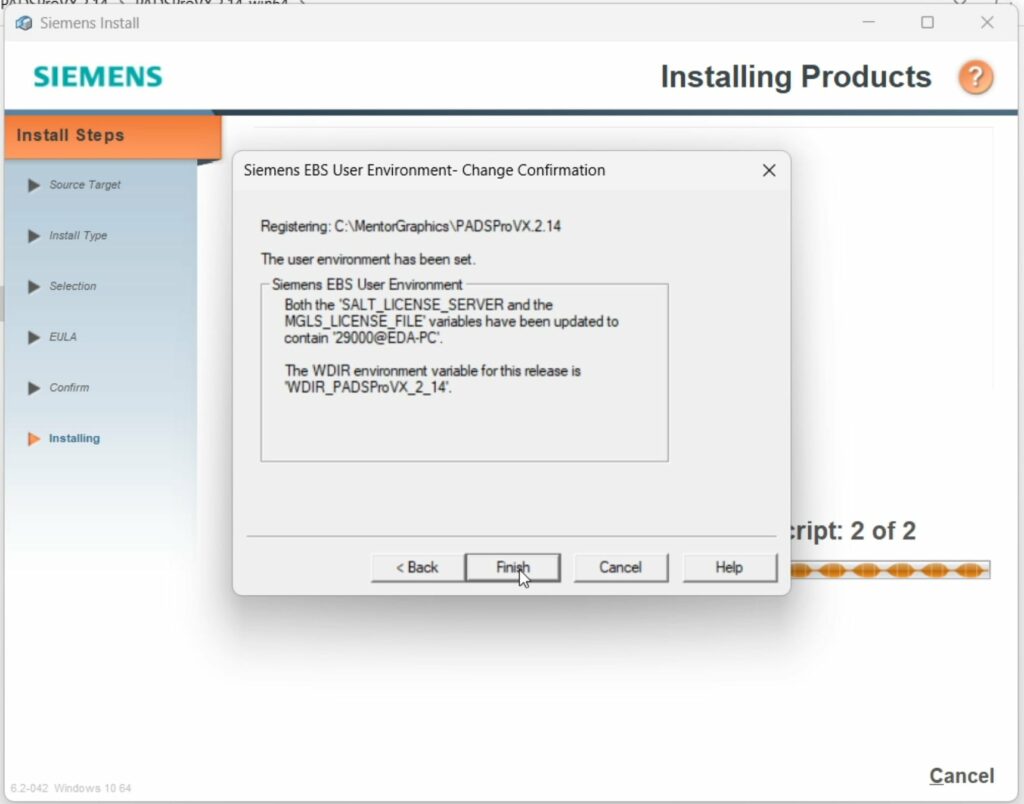
26. Installation may require filling in the license server data once again in format port_number@host_name, in our case it is 29000@EDA-PC.
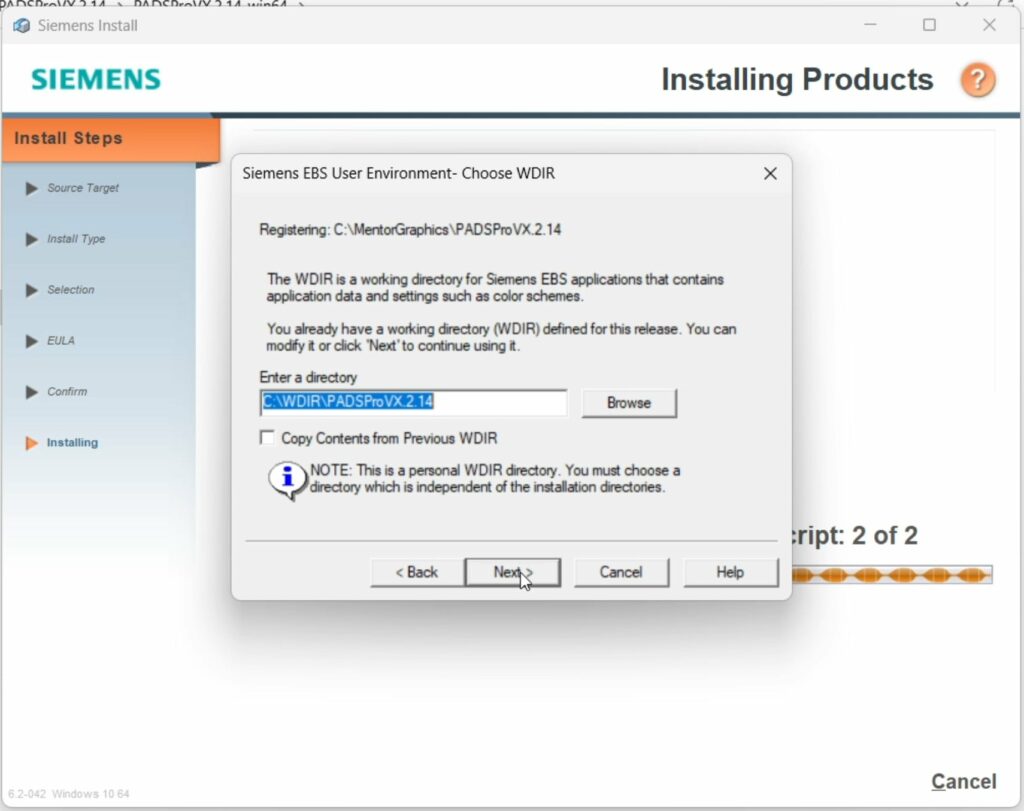
27. Define a working directory (WDIR). Here it will be C:\WDIR]PADSProVX.2.14.
28. Finish environment configuration by clicking “Finish”.
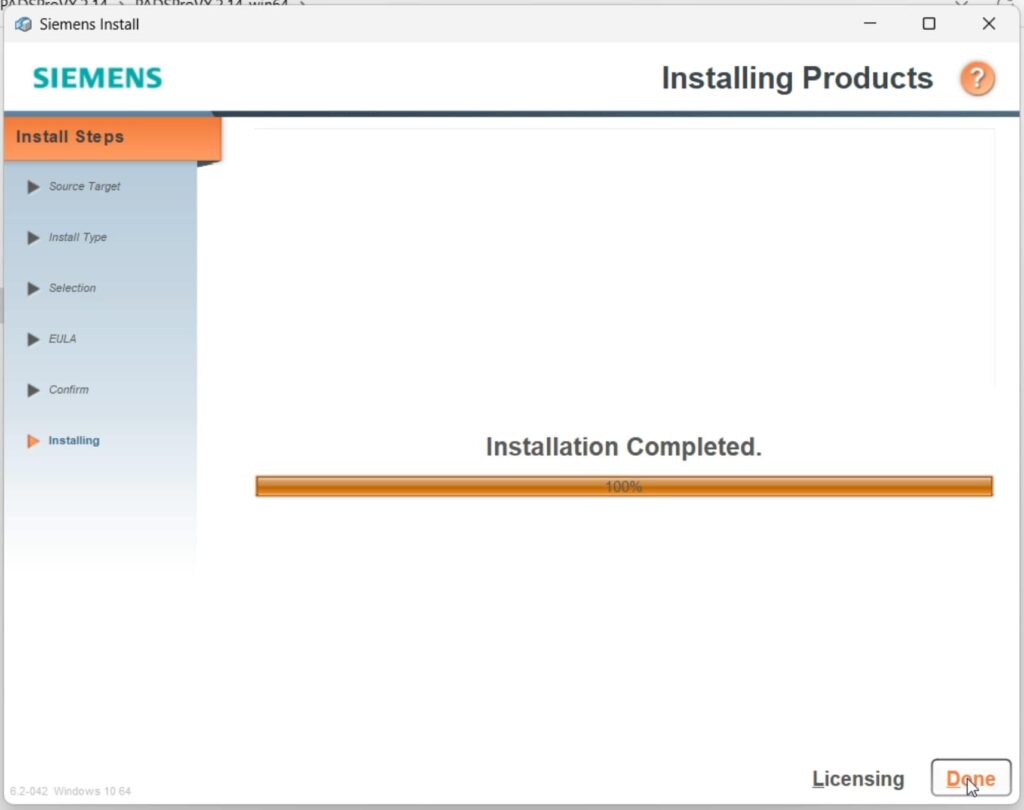
29. Complete installation.
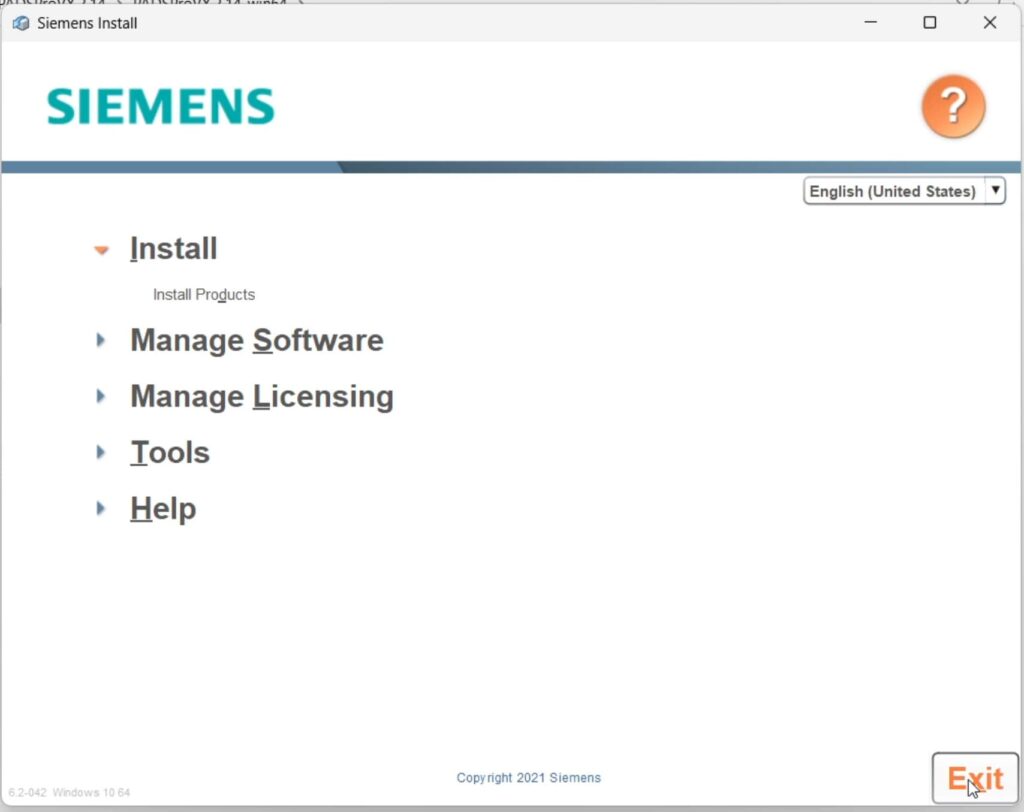
30. Exit installation.
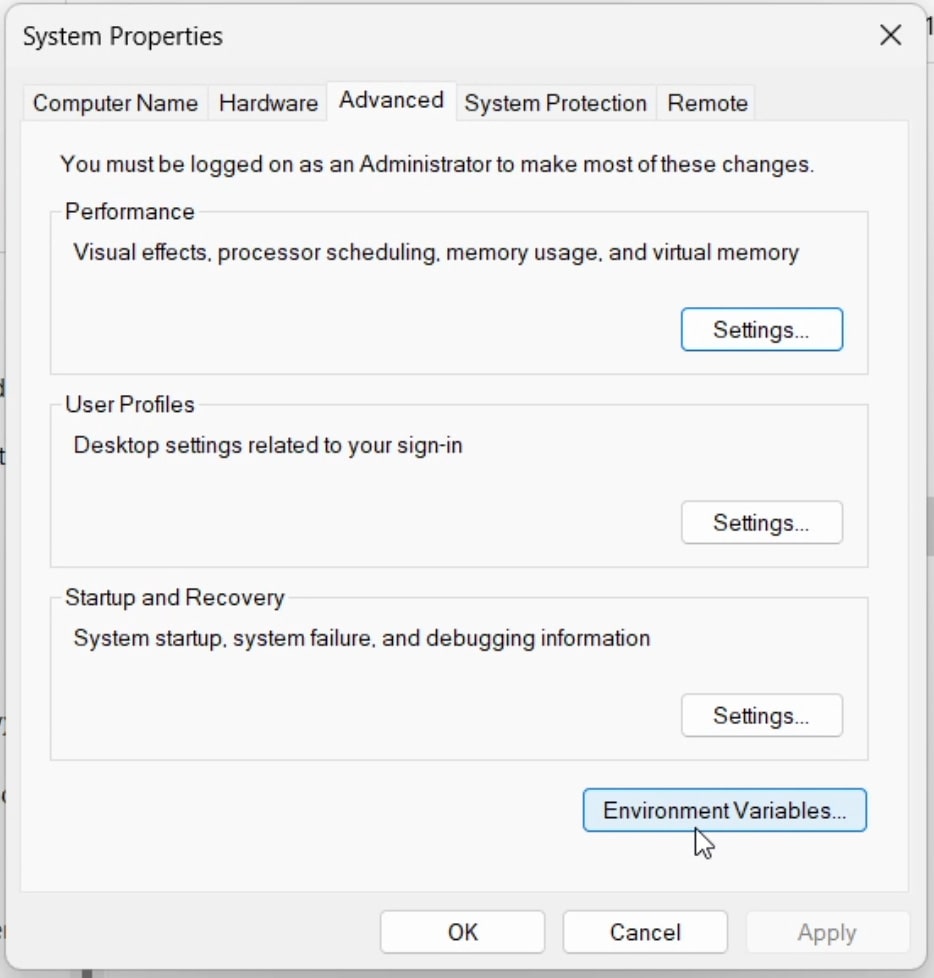
31. (OPTIONAL) Open Windows system environment variables.
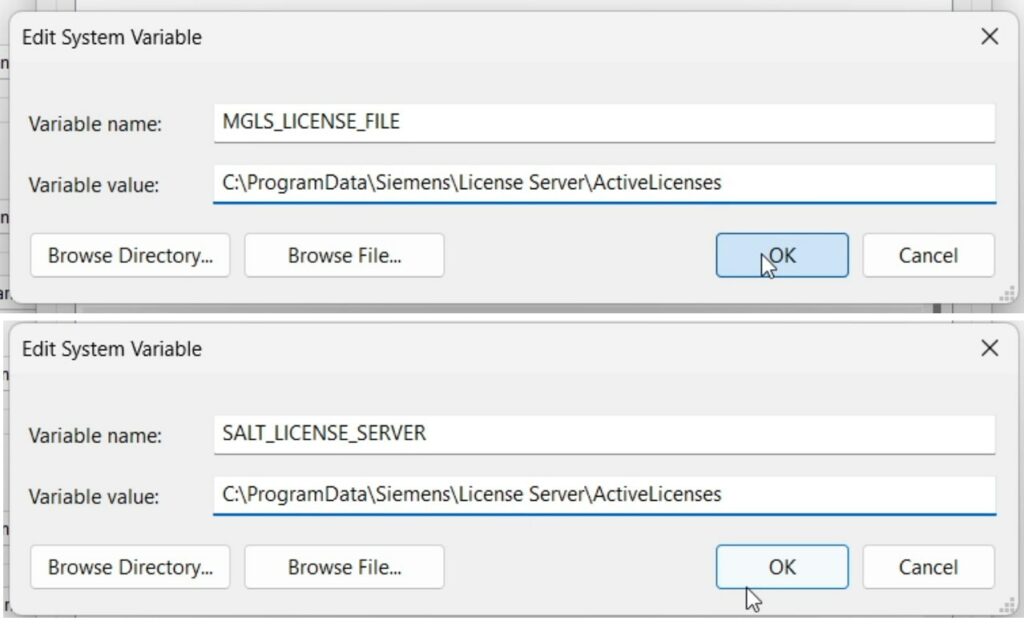
32. (OPTIONAL) Make sure that the generated variables are correct.
PADS Professional has been expertly configured and is now primed to cater to your requirements!
Should you desire more information about PADS Professional, Xpedition, HyperLynx, or any other EDA solutions, do not hesitate to contact Sintecs at eda@sintecs.eu. Our team is eager to offer you professional support and assist with your inquiries.


